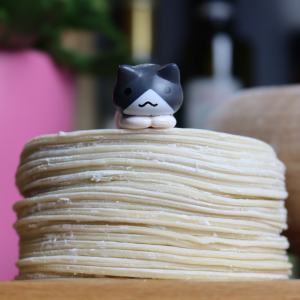
Homemade Gyoza Wrappers (4 SIMPLE Ingredients!)
This post may contain affiliate links. Please read my disclosure policy for details.
No Asian shop around you? Or just feeling like tasting what fresh gyoza wrappers are like in comparison to store-bought wrappers? Gyoza dough is super simple to make at home, you only need THREE ingredients!

Making gyoza wrappers from scratch is simpler than you think. It just requires 3 basic ingredients that everyone has at home: flour, salt and water. Sometimes, depending on where you live, it can be difficult to find Asian grocery stores. But you still fancy some homemade gyozas? Well, you can get them done at home : )
In terms of taste, there’s really no difference between store-bought or homemade gyoza wrappers. But in terms of texture, well, homemade is always more fresh than store-bought, right?
I normally like making Japanese gyozas and Korean mandu from scratch, apart from the wrappers which I buy from the store or make at home, depending on the time I have to dedicate. I have never been a fan of dumplings bought from the supermarket, and they really don’t take that long to make.
Do I need an electric robot?
If you do have one, simplify your life : ) go ahead and use it. If not, this is totally fine to knead the gyoza dough by hand. Knead the dough for about 15-20 minutes until all ingredients are well combined together and until the dough is no longer wet.
Can I freeze the gyoza wrappers?
Yes, gyoza wrappers can be frozen just like the ones sold at the supermarket. Separate each wrapper with some parchment paper or plastic wrap. Place them in a zip bag and freeze them. For defrosting, you can simply let them defrost in the fridge. However, I wouldn’t recommend leaving the wrappers in the fridge. Since these are fresh, the flour can quickly oxidize.
How to prepare gyoza wrappers?
- Place the flour in an electric mixer. Boil water and dissolve the salt in it.
- Add the water bit by bit to the flour while mixing it. When the dough looks dry, you no longer need to add water. Depending on your type of flour, you may need a little less water. The dough should no longer look wet.


- Roll the dough into a long log (3-4 cm / 1.5″ diameter). Cut it in two, wrap the two logs with plastic wrap and let them sit in the fridge for 30 minutes.

- Cut each log into 2 smaller logs. Then cut each log into 6 pieces.

- Roll each piece into a ball.

- Use a rolling pin to flatten the dough (should be 1 mm thick) then cut a neat circle using a cookie cutter.

- Dust each side of the dough with cornstarch or potato starch.
- While you are repeating the process, place a wet towel over the dough pieces so that they do not dry out too much.


More appetizer ideas? Check these!
RECIPES IN YOUR INBOX? Don’t forget to subscribe to my newsletter to receive the latest recipe updates delivered for free directly to your inbox! Oh, and you will also find me on Youtube, Instagram, Facebook and TikTok. Come say hi and leave me a message, it is always a pleasure to connect with all of you!
Thanks so much for stopping by! xx


Homemade Gyoza Wrappers
Equipment
- 8cm / 3.2” cookie cutter
Ingredients
for 24 wrappers
- 300 g all-purpose flour
- ½ tsp salt
- 150 ml boiled water
- cornstarch or potato starch | for dusting
- plastic wrap
Instructions
- Place the flour in an electric mixer.
- Boil water and dissolve the salt in it.
- Add the water bit by bit to the flour while mixing it. When the dough looks dry, you no longer need to add water. Depending on your type of flour, you may need a little less water. The dough should no longer look wet.
- Roll the dough into a long log (3-4 cm / 1.5" diameter). Cut it in two, wrap the two logs with plastic wrap and let them sit in the fridge for 30min.
- Cut each log into 2 smaller logs. Then cut each log into 6 pieces.
- Roll each piece into a ball.
- Use a rolling pin to flatten the dough (should be 1 mm thick) then cut a neat circle using a cookie cutter.
- Dust each side of the dough with cornstarch or potato starch.
- While you are repeating the process, place a wet towel over the dough pieces so that they do not dry out too much.


Hi,
Thank you so much for sharing this wonderful recipe.
Just curious, why do we dust them with corn flour or sweet potato flour?
Hi Jasmine, you’re welcome. Dusting corn flour or potato flour helps the dough not to stick. Since this is fresh dough, two wrappers could stick to each other too easily. It is also easier for you to fold the gyoza afterwards with a wrapper that isn’t too sticky 🙂 Emma xx