These are the CUTEST steamed buns you could ever make! They’re soft, pillowy and filled with a rich custard. They’re perfect to celebrate Lunar New Year (The Year of the Rabbit), Easter, or just to make any time you’re feeling like some comforting Asian treats.
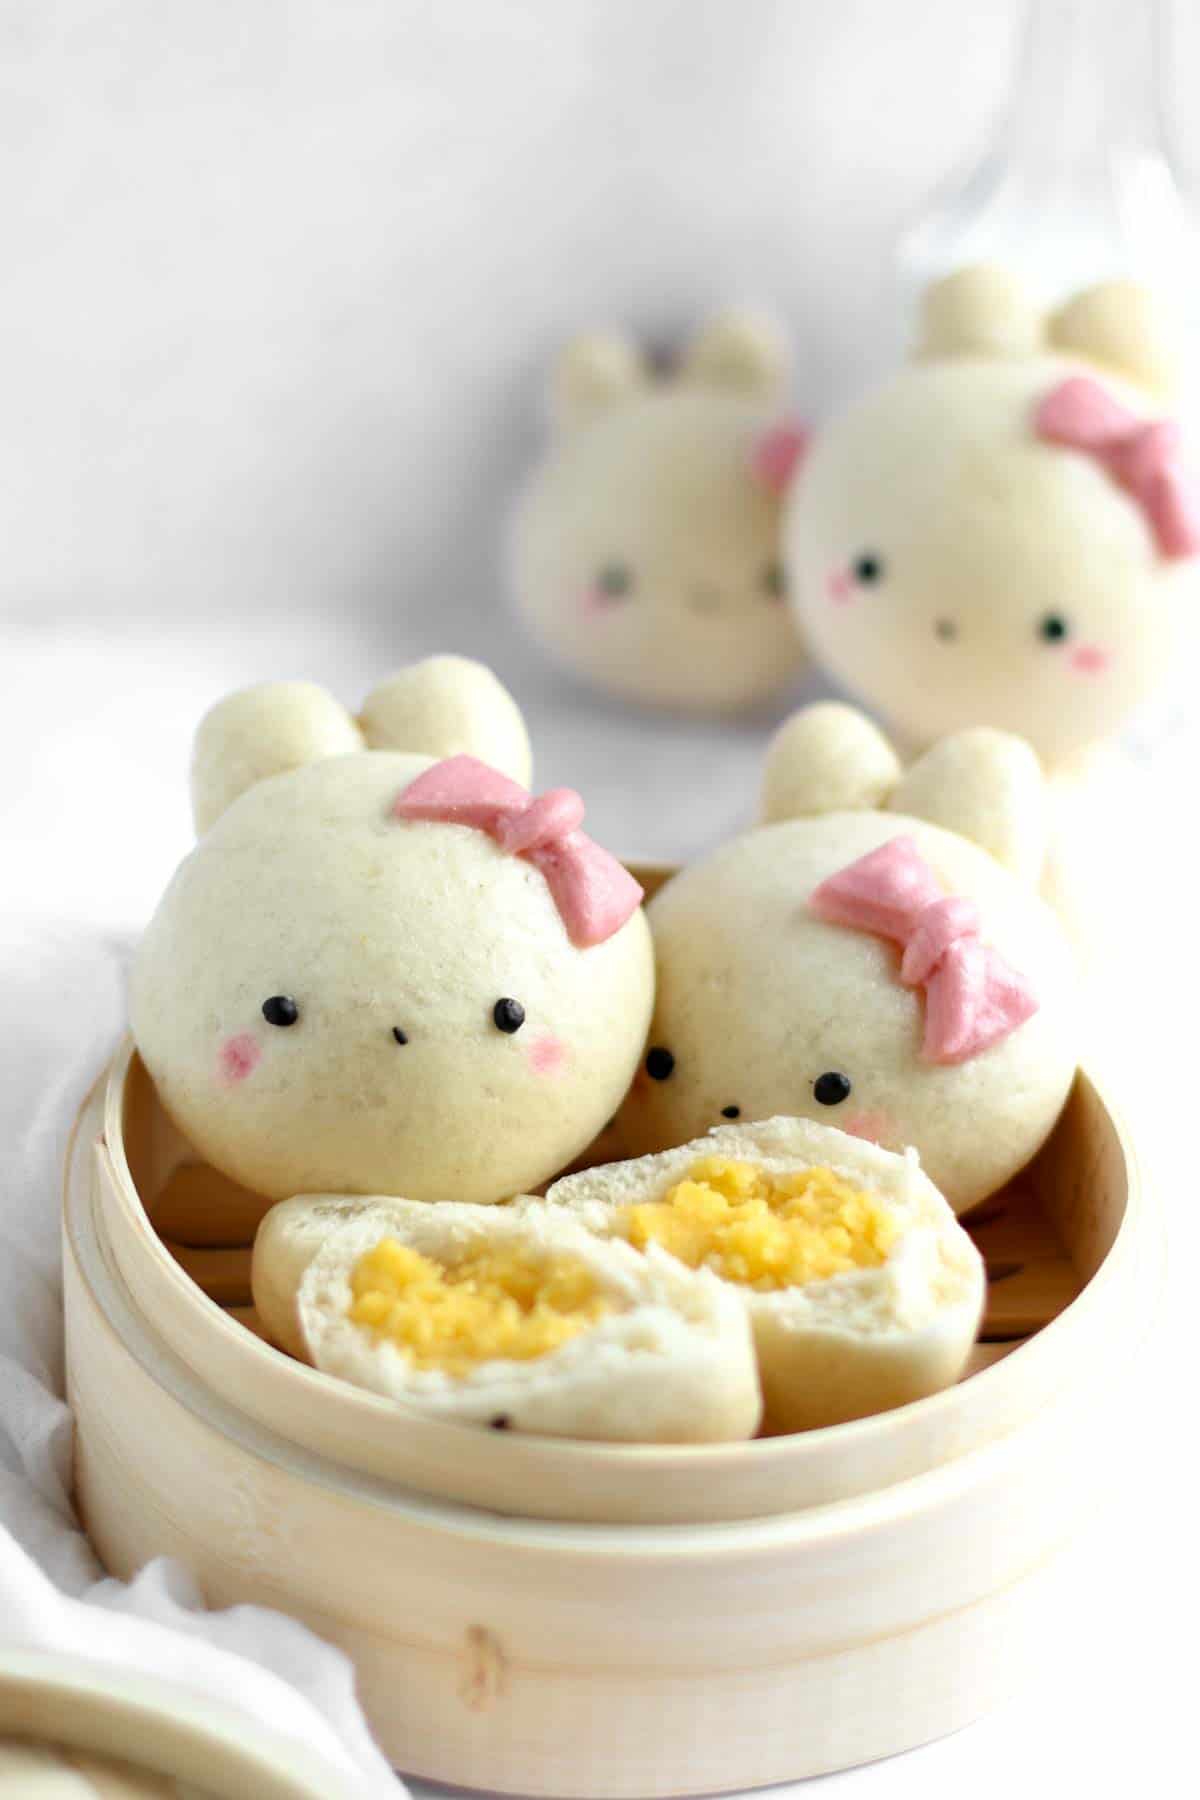
Aren’t these extreeemely cute?
You might know it by now but I get so excited by everything cute… and food is no exception. Sometimes I’d just buy things because they’re cute, even though I’d make no use of them :’)
Lunar New Year is just a few days away so I wanted to make something for the occasion. I’ve been wanting to make some custard buns for a while so I thought this was the opportunity to make some, but in a cute shape. This year (2023) is the Year of the Rabbit. It’s actually also my year so hopefully, that should be a good one, fingercrossed!
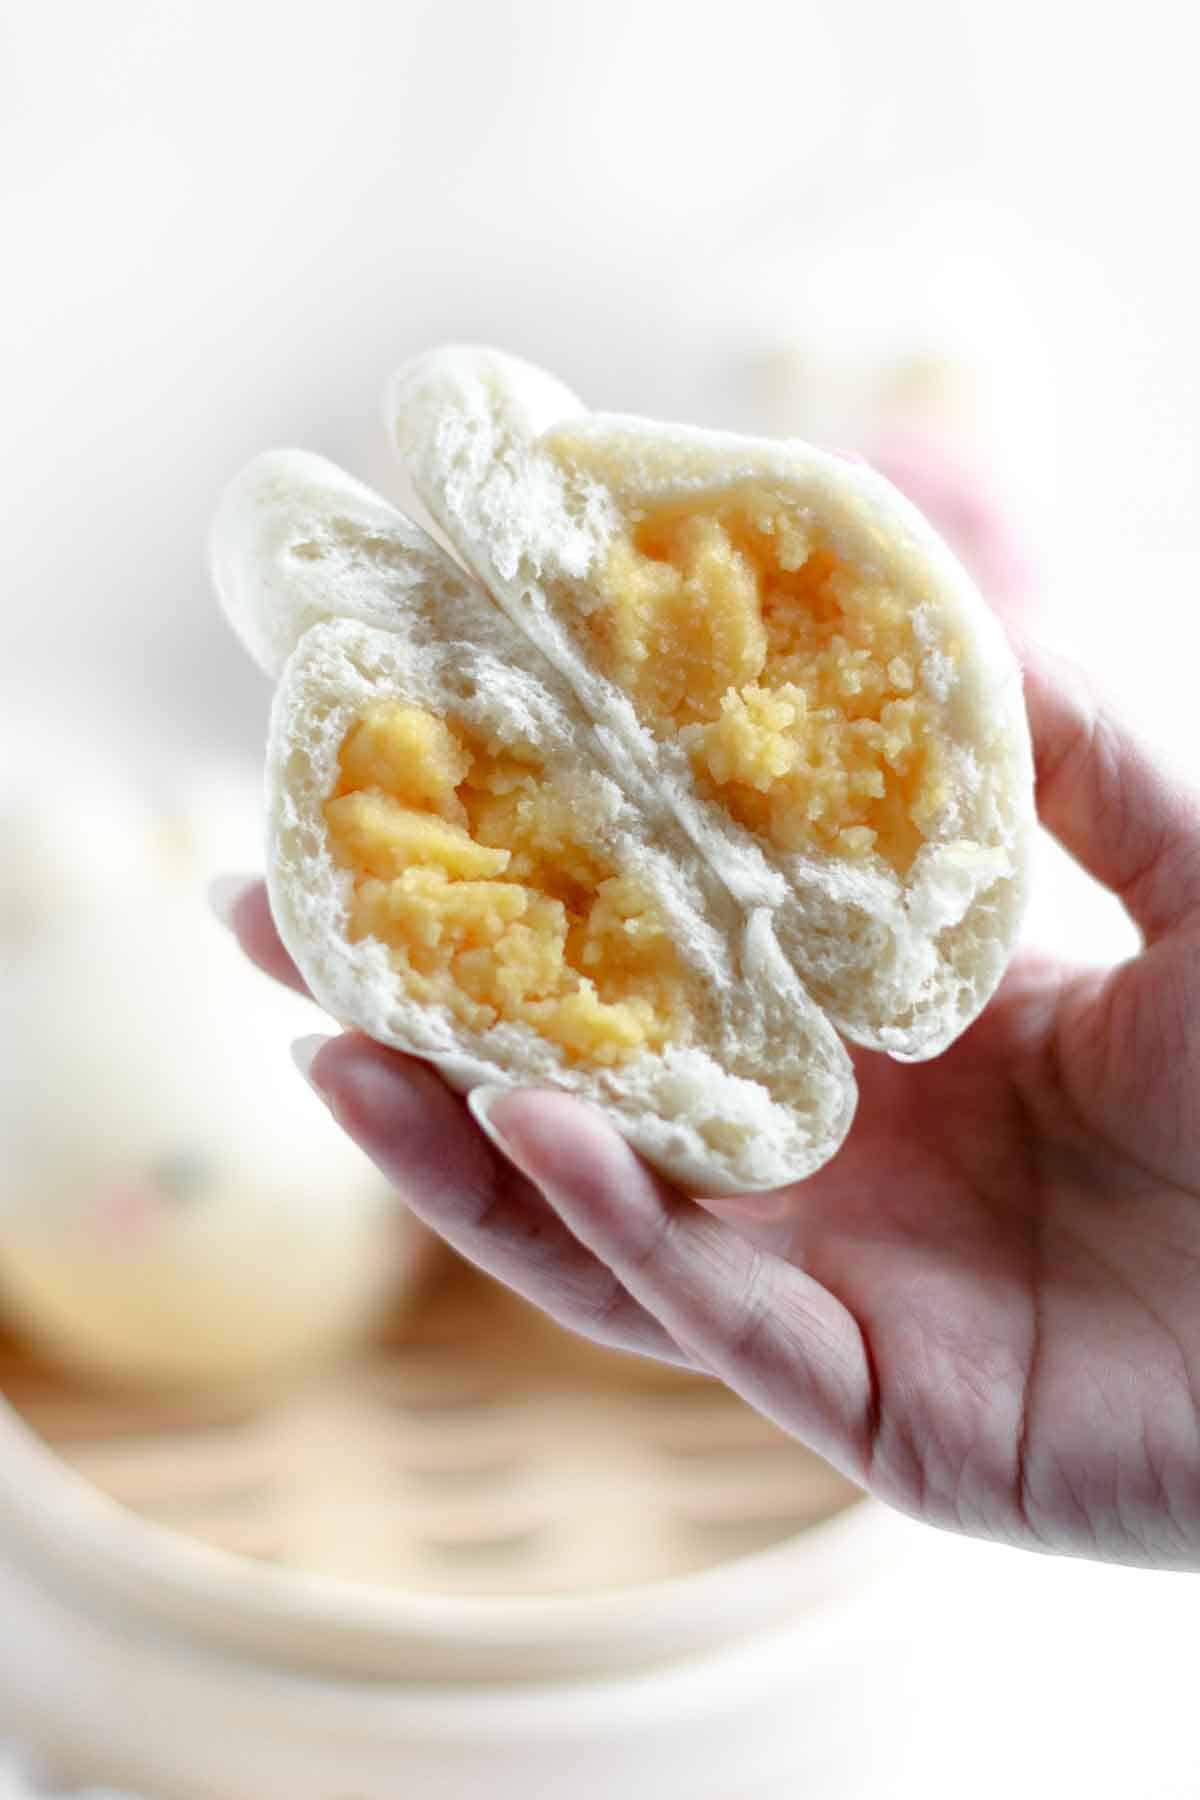
Steamed buns (savory or sweet) are often found in dim sum restaurants or in Asian bakeries. I love their pillowy texture! My favorite fillings are custard and char siu (BBQ pork). What’s yours?

Ingredients
custard
- egg yolks – I use medium-sized eggs. Keep the whites aside for some other recipe since you’ll only need the yolks to make the custard.
- sugar – use regular white sugar or caster sugar. Sugar cannot be substituted by honey since that would change the consistency and taste of the custard.
- cake flour – use cake (pastry) flour to make the custard, it will make the custard “softer” than if you’re using regular all-purpose flour.
- cornstarch – cornstarch helps thicken the custard mixture.
- milk – I always use semi-skimmed milk (not just for this recipe but in general) but you can also use full-fat regular milk.
- unsalted butter – I would recommend unsalted butter since you don’t want any salty taste in your custard.
dough
- all-purpose flour – I usually use all-purpose flour to make buns since this is what I most often have at home and didn’t have enough cake flour this time however you can also use cake flour for the dough. Even better, if you find bao flour (flour specifically made for buns) it is even better. This flour has a lower gluten level and will give you even more fluffy buns. Since this type of flour is more refined, it will also give you whiter buns.
- sugar – use regular white sugar or caster sugar.
- instant yeast – I use instant yeast in all of my “bread” recipes, it just makes it easier. Both instant yeast and regular dry yeast look similar so make sure you are using INSTANT yeast. If not, you’ll need to activate the yeast beforehand.
- cold milk – use either cold milk or room temperature milk but make sure NOT to use lukewarm or warm milk so the dough doesn’t rise too fast. We need some time to work and shape the dough.
- cooking oil – I used sunflower oil but you can use any cooking oil that is neutral in flavor. Avoid oil such as olive oil, peanut oil, etc. Adding some oil to the dough will prevent it from drying too fast.
- red food coloring – you can use either powder, gel or liquid red food coloring. I had liquid food coloring so this is what I used to make the pink bowknots and to draw the cheeks. The amount of food coloring you need to use depends on the brand and on the type of food coloring you’re using. Adjust until the desired color is reached. I only needed 3 drops to make the pink dough.
- black food coloring – same as the red food coloring however I had black food coloring powder so this is what I used. Liquid or gel will do fine as well. In case you have food coloring pens at home, feel free to use that to draw eyes and nose.
- black sesame seeds – the black sesame seed makes a cute nose. But you can use a black food coloring pen if you have one instead.
Can I Knead The Steamed Buns Dough By Hand?
I definitely recommend using a stand mixer to knead the dough since this recipe requires a long kneading time.
One important step in making steamed buns dough is to knead long enough to obtain a SMOOTH DOUGH. If you under knead your dough, your buns’ surface will not be perfectly smooth and will get “wrinkles” when shaping and steaming them.
That being said, you can still knead the dough by hand but you’ll need a lot of elbow grease AND patience. For a perfectly smooth dough, it takes 10 minutes if using a stand mixer on medium speed. So you may have to triple/quadruple that to obtain the same result by hand.
Why Are My Steamed Buns Not Smooth?
There are several reasons why your dough may not be smooth:
- Under kneading: as mentioned above, one key to getting a smooth dough is to knead the dough long enough. Keep kneading your dough until it becomes perfectly smooth to avoid wrinkles on your buns.
- Overproofing: leaving your buns to rise for too long will cause them to somewhat deflate and wrinkle when steamed.
- Opening the steamer lid too quickly: once you’ve steamed the buns for 10 minutes, DO NOT OPEN THE LID. Instead, keep the lid closed, turn the heat off and let the buns rest for 10 more minutes. If you remove them from the steamer right away, the temperature difference will cause them to wrinkle here and there. Taste and texture won’t be affected but for the aesthetic of the buns, keep them 10 more minutes, lid closed 🙂
How Long to Steam Custard Buns?
10 minutes is sufficient. If you oversteam them, the buns may become soggy so make sure you set your timer.
How To Make Custard Steamed Buns?
custard
- Prepare the custard – whisk egg yolks, sugar, cake flour and cornstarch together. Add in milk and combine together.
- In a pan, melt the butter, add the custard mixture, and cook on medium heat until the custard becomes thick and dry.
- Transfer the custard to a container and let it cool in the refrigerator for 2 hours.
- Once the custard has cooled, divide it into 6 equal parts and shape 6 balls (each ball should equal 34 g / 1.2 oz)
dough
- Prepare the dough – in the stand mixer bowl, add all-purpose flour, sugar, instant yeast, cold milk and cooking oil. Use the hook attachment and knead on medium speed for 10 minutes. The dough should look smooth. If not, keep kneading it.
- Shape the body – cut 310 g / 11 oz of dough. Then divide it into 6 equal parts (each part should weigh 51g / 1.8 oz). Knead by hand each piece of dough and shape a ball. Cover it with a wet towel while you repeat this step for the 6 parts. The wet towel will prevent the dough from drying.
- Using a rolling pin, flatten each piece of dough. Place a custard ball in the center, pull up all sides, and seal the bun. Place the dough on your working surface, and use your hands to slightly shape the dough into an oval shape. Place it on a piece of baking paper, then cover it back with a wet towel. Repeat for each piece of dough.
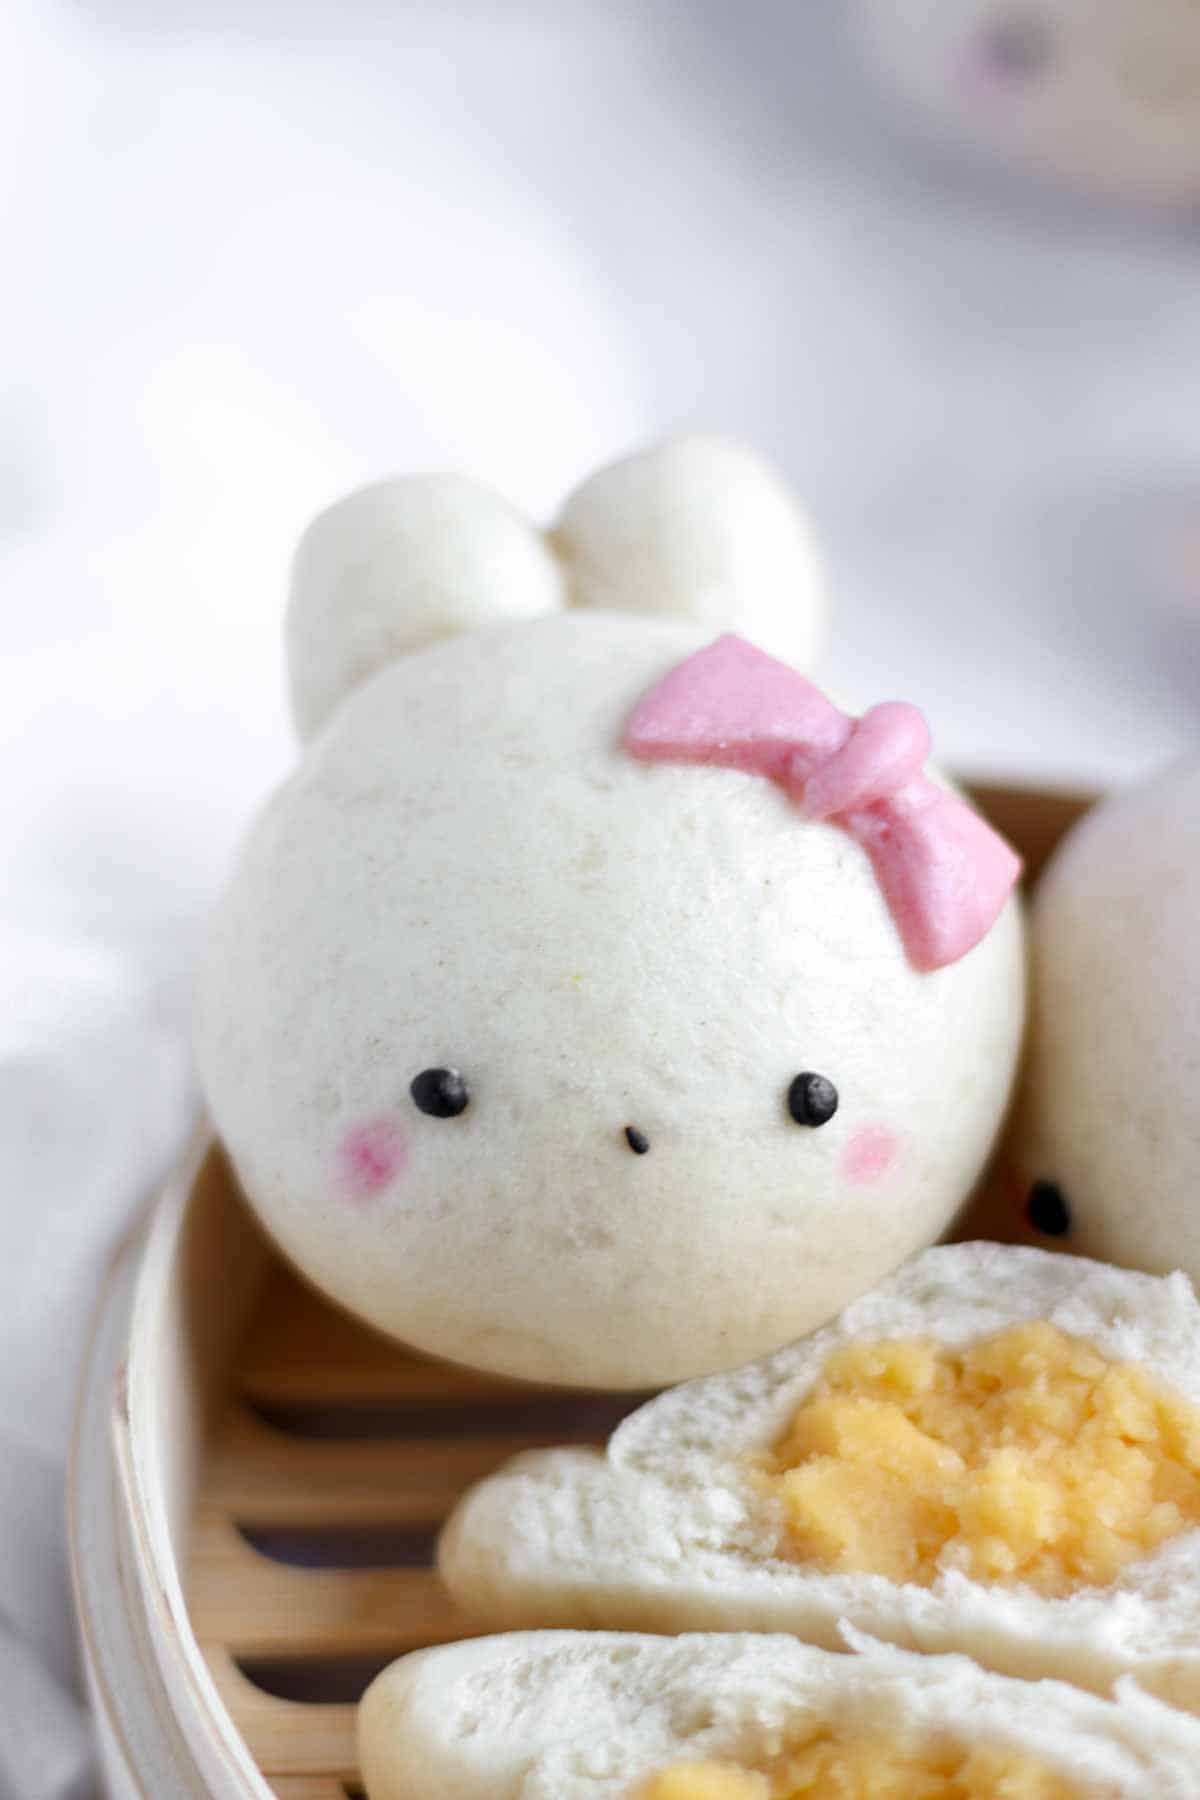
- Shape ears – from the remaining dough, cut off 72g / 2.53 oz. Then divide it into 12 equal parts (each part should weigh 6g / 0.21 oz). Shape each piece of dough into ears. Flatten the end part and dip it into a bit of milk so that it helps stick to the head. Stick the ears at the back of the head.
- Shape bowknots – from the remaining dough, cut off 30g / 1.05 oz. Add a few drops of red food coloring (the amount depends on the food coloring brand and type you are using). Knead the dough until the color becomes light pink and even throughout the dough. Using a knife, cut the dough and shape some bowknots. Then use some leftover dough to roll a thin log and place it vertically in the middle of the bowknot. Dip your finger into milk and wet the top of the body where you want to place the bowknot. Stick the bowknot onto the head.
- Shape eyes – use the remaining piece of dough and add in some black food coloring. Knead until the color becomes even. Use a rolling pin to flatten the dough (1mm / 0.03” thick). Use a straw to cut out 12 eyes. Dip your finger in a bit of milk and wet the area where you will stick the eyes. Stick the eyes.
- Make the nose – dip your finger in some milk and wet the area where you will place the nose. Grab 1 black sesame seed and place it on the bun.
- Make the cheeks – pour a few red food coloring drops into a small bowl or plate. Dip the tip of a kitchen towel in it and dab it onto the bun where the cheeks are.
- Proofing – let the buns rest for 30 minutes.
- Steam the buns – steam the buns for 10 minutes. Make sure you leave enough space in between each other since they will slightly increase in size. You won’t be able to fit the 6 of them in your steamer, so steam them in batches. Once cooked, do not open the lid and leave them in (lid closed) for 10 more minutes. This is optional but will allow the buns not to wrinkle and keep their perfectly smooth surface.
- Serve while they’re still warm.
Storage
Custard steamed buns are best if you have them warm, just out of the steamer. However, if you’ve got some buns left, you can keep them in the refrigerator for up to 3 days. Do not leave them for more than a day at room temperature since they are filled with custard.
You can freeze the buns and reheat them in your steamer for 3 minutes (if defrosted) and for 6-7 minutes if frozen.
More Cute Recipes? Check These:
- Honeycomb-shaped Pineapple Coconut Cheesecakes
- Spicy Tuna Yaki Onigiri with Kimchi
- Bungeoppang (Korean Fish-Shaped Pastry)
- Christmas Tree Meringues
JOIN US!
If you make this recipe, be sure to leave a comment & a rating ★ below so I know how you liked it!
Also, don’t forget to sign up for my free newsletter to get new recipes straight to your inbox. xo

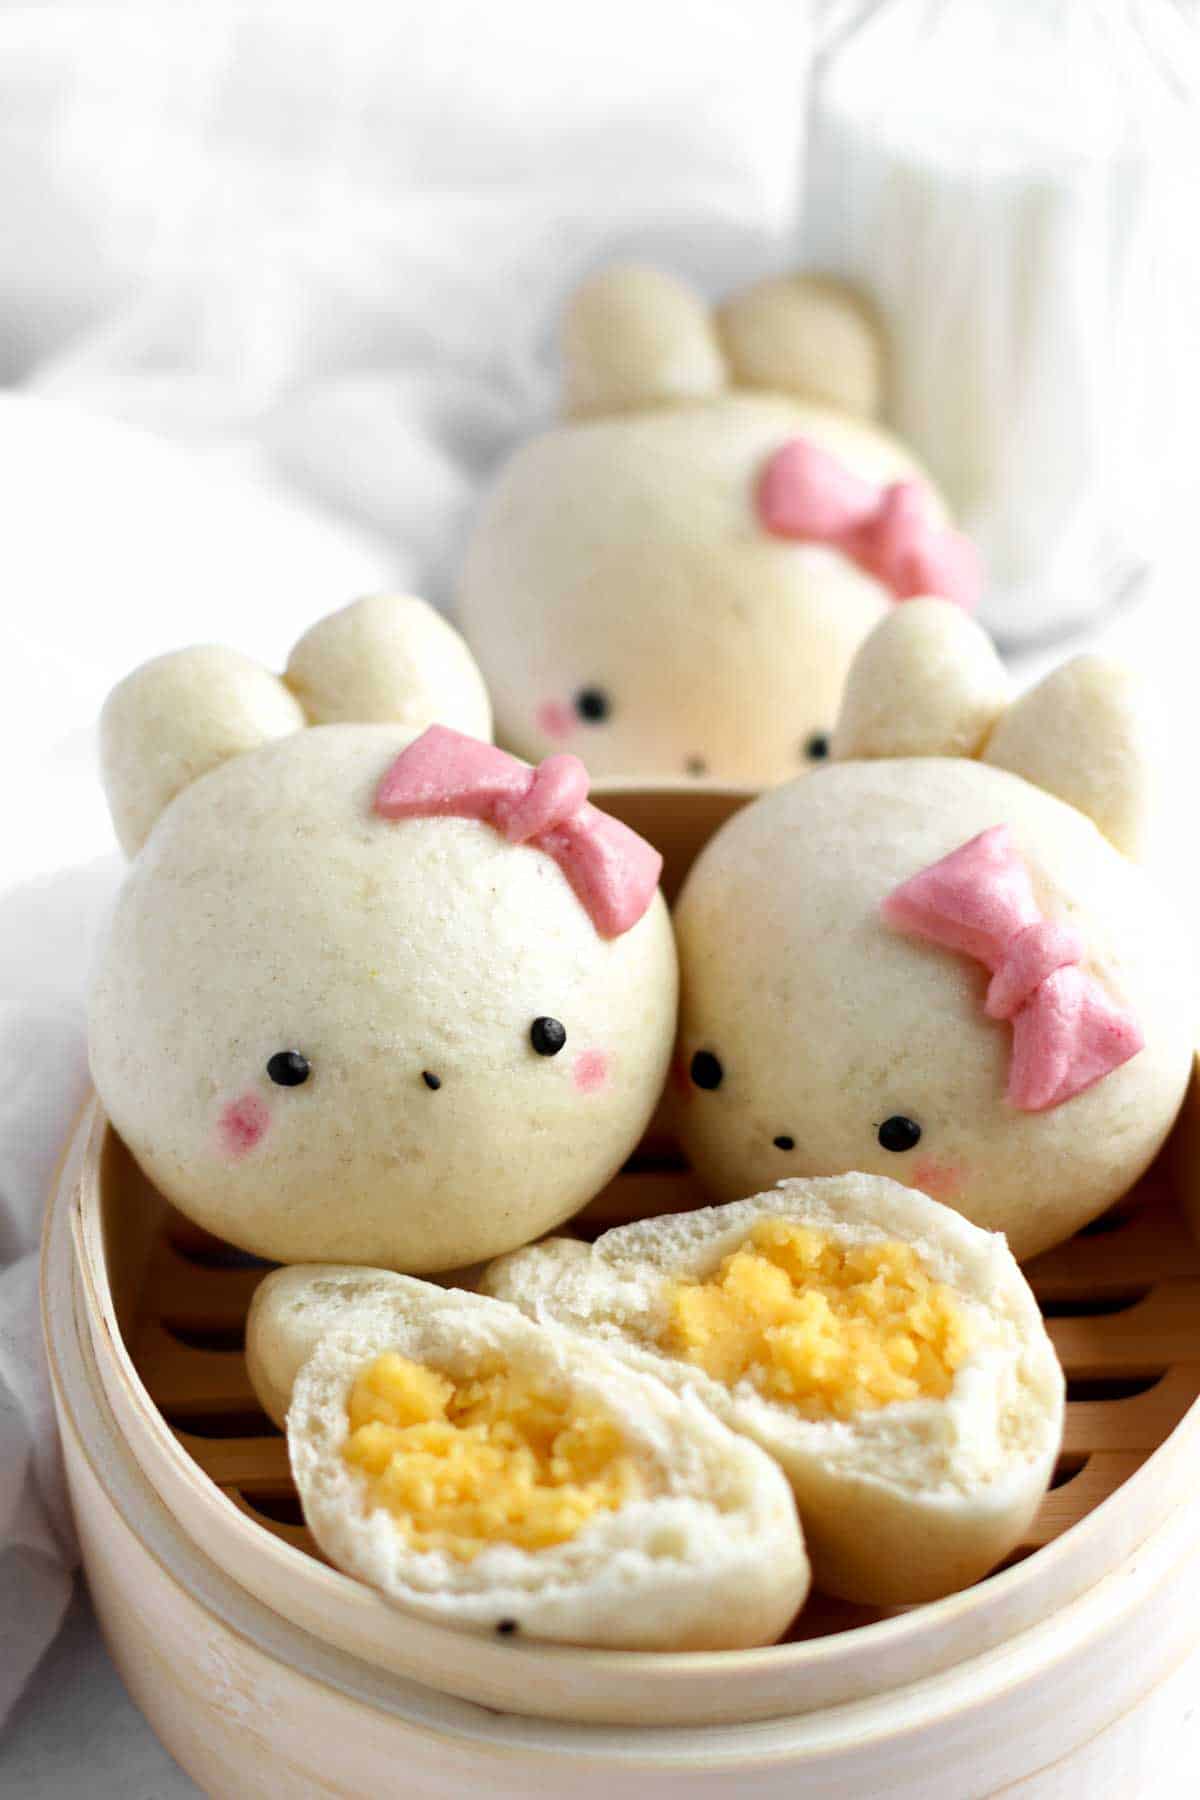
Bunny Custard Steamed Buns
Ingredients
custard
- 2 egg yolks
- 40 g sugar
- 13 g cake flour
- 13 g cornstarch
- 140 ml milk
- 30 g unsalted butter
dough
- 250 g all-purpose flour
- 3 tbsp sugar
- 3 g instant yeast
- 140 ml cold milk (Note 2)
- 1 tbsp cooking oil
- red food coloring
- black food coloring
- 6 black sesame seeds
Instructions
custard
- Prepare the custard – whisk egg yolks, sugar, cake flour and cornstarch together. Add in milk and combine together.
- In a pan, melt the butter then add the custard mixture and cook on medium heat until the custard becomes thick and dry.
- Transfer the custard to a container and let it cool in the refrigerator for 2 hours.
- Once the custard has cooled, divide it into 6 equal parts and shape 6 balls (each ball should equal 34 g / 1.2 oz)
dough
- Prepare the dough – in the stand mixer bowl, add all-purpose flour, sugar, instant yeast, cold milk and cooking oil. Use the hook attachment and knead on medium speed for 10 minutes. The dough should look smooth. If not, keep kneading it (Note 1).
- Shape the body – cut 310 g / 11 oz of dough. Then divide it into 6 equal parts (each part should weigh 51g / 1.8 oz). Knead by hand each piece of dough and shape a ball. Cover it with a wet towel while you repeat this step for the 6 parts. The wet towel will prevent the dough from drying.
- Using a rolling pin, flatten each piece of dough. Place a custard ball in the centre and pull up all sides then seal the bun. Place the dough on your working surface, and use your hands to slightly shape the dough into an oval shape. Place it on a piece of baking paper then cover it back with a wet towel. Repeat for each piece of dough.
- Shape ears – from the remaining dough, cut off 72g / 2.53 oz. Then divide it into 12 equal parts (each part should weigh 6g / 0.21 oz). Shape each piece of dough into ears. Flatten the end part and dip it into a bit of milk so that it helps stick to the head. Stick the ears at the back of the head.
- Shape bowknots – from the remaining dough, cut off 30g / 1.05 oz. Add a few drops of red food coloring – the amount depends on the food coloring brand and type you are using (Note 3). Knead the dough until the color becomes light pink and even throughout the dough. Using a knife, cut the dough and shape some bowknots. Then use some leftover dough to roll a thin log and place it vertically in the middle of the bowknot. Dip your finger into milk and wet the top of the body where you want to place the bowknot. Stick the bowknot onto the head.
- Shape eyes – use the remaining piece of dough and add in some black food coloring. Knead until the color becomes even. Use a rolling pin to flatten the dough (1mm / 0.03” thick). Use a straw to cut out 12 eyes. Dip your finger in a bit of milk and wet the area where you will stick the eyes. Stick the eyes.
- Make the nose – dip your finger in some milk and wet the area where you will place the nose. Grab 1 black sesame seed and place it on the bun.
- Make the cheeks – pour a few red food coloring drops into a small bowl or plate. Dip the tip of a kitchen towel in it and dab it onto the bun where the cheeks are.
- Proofing – let the buns rest for 30 minutes.
- Steam the buns – steam the buns for 10 minutes. Make sure you leave enough space in between each other since they will slightly increase in size. You won’t be able to fit the 6 of them in your steamer, so steam them in batches. Once cooked, do not open the lid and leave them in (lid closed) for 10 more minutes. This is optional but will allow the buns not to wrinkle and keep their perfectly smooth surface.
- Serve while they’re still warm.
recipe notes
Equipment


Video
Nutrition
The nutritional details provided on That Cute Dish are for informational purposes only and are automatically calculated. Please consider them as estimates rather than precise values, as ingredients and measurements can vary.